We live in an old cottage. The oldest part of the house dates to the 1750s, there are beams, inconveniently thick (and occasionally damp) walls, not enough insulation, and spiders so big they make a noise when they hit the ground after you've chucked them out of the window. I love it - although the spiders can be quite surprising sometimes...
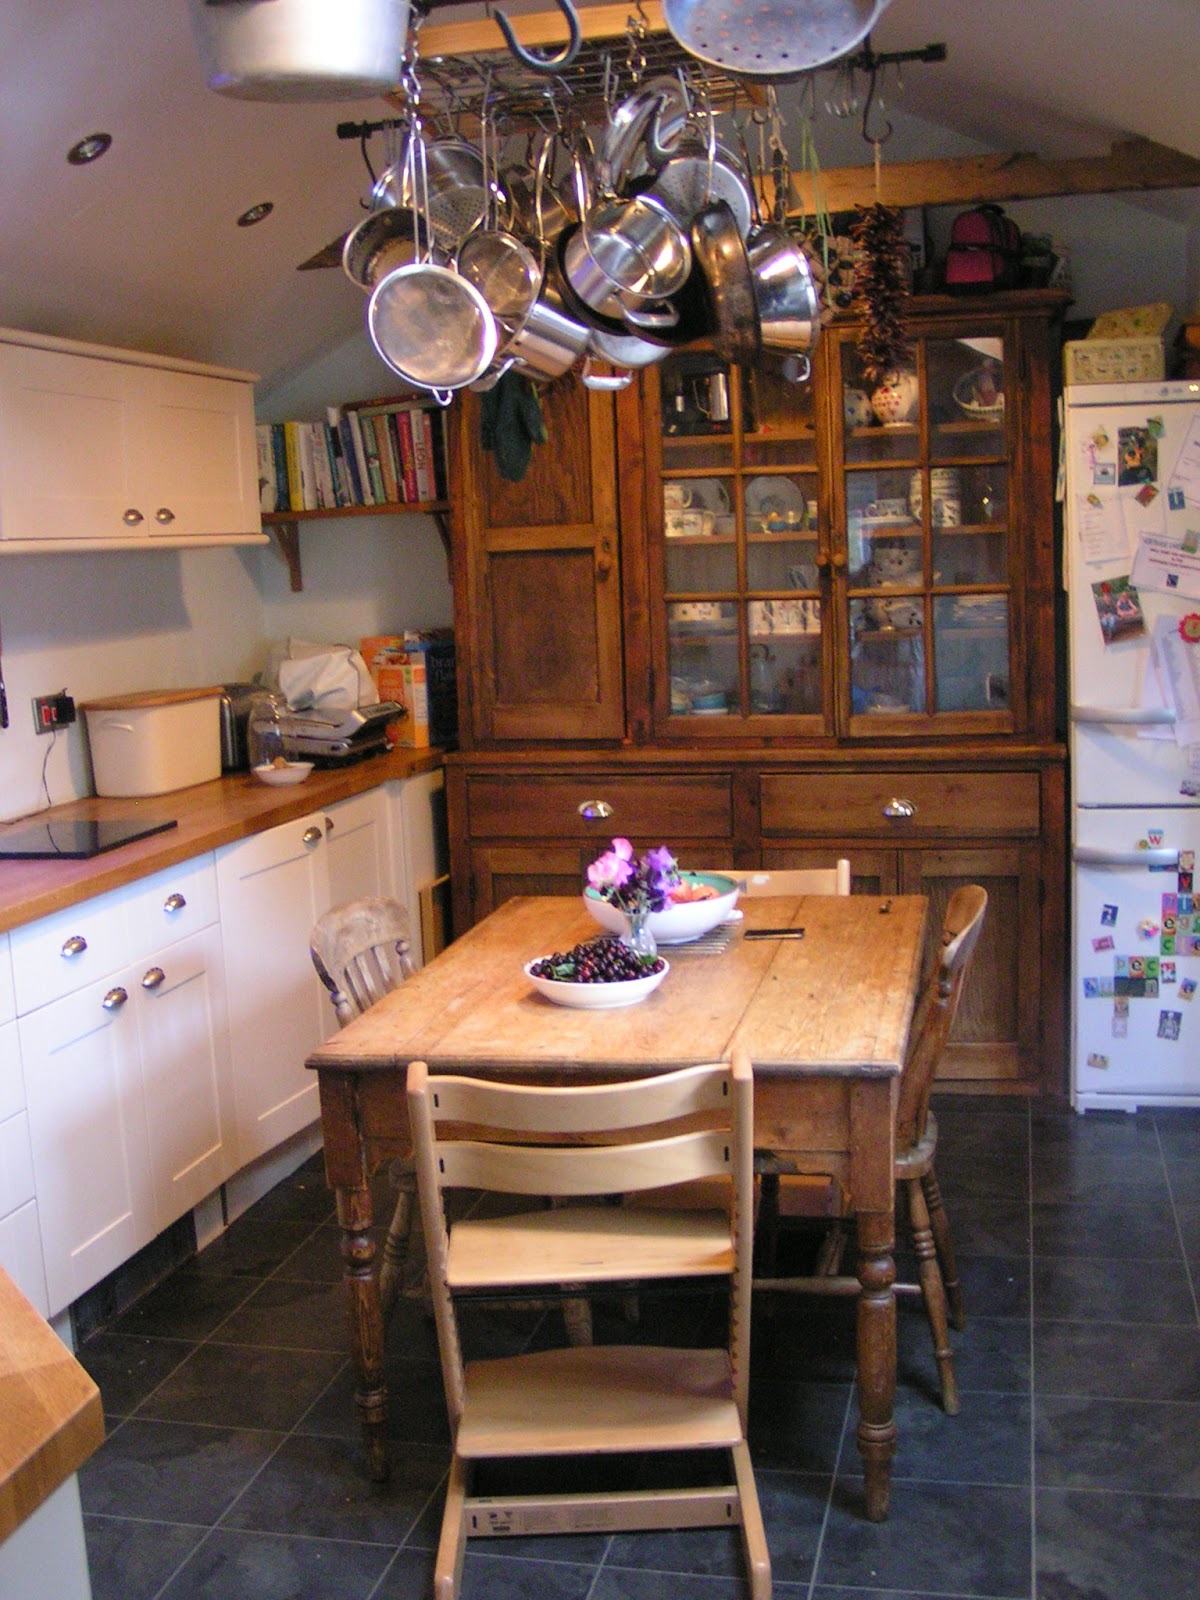 The kitchen lives in what we think was once a separate outhouse/washhouse/beer cellar. It stretches out of the back of the house on one side, edging a decking area that fills in the square-ish space at the back of the house. The house was once a pub - The Old House at Home. There is now a new 'Old House at Home' over the road which replaced it in the 1920s. We are too close to the river to have a proper cellar - underground, the water table is not too many feet below us - and we understand that this is where the beer was stored at one time. Since then, we know that the room that is now our kitchen has also been the bedroom/music room of a young teenager. We know this because when we had the kitchen done up a few years ago, the same teenager (now in his 40s) did the tiling for us. Village life...
 So the kitchen has not been the kitchen of the house for that long, relatively speaking, and certainly before we moved in, the house hadn't had small children living in it for some time. With 2 big dressers at either end, an enormous and impressive French range cooker (can one admit to wanting to buy a house solely for the cooker that is currently in it?) and a big 'breakfast bar' which provided worktop and pan storage down the centre of it, dividing the space between the cooker and the sink, it was not a family friendly kitchen. The room is not all that big, and all this big furniture reduced the space quite dramatically. Chuck in 2 small windows, some dingy yellow paint and navy blue tiling, and you can imagine it was quite dark and dingy.
We immediately got rid of the breakfast bar (Ebay is a marvellous thing), and installed the 'family' table. The beautiful range cooker eventually had to go too - beautiful and French it may have been but trying to get parts for it as it started to breakdown was a nightmare. We put in a roof light to increase the natural light and a few years ago we put proper units in and moved where the cooker was (installing a newer and less complicated range cooker which I do love for all that it's not French and steel) to give a long run of worktop, perfect for me to make as much mess as I want (when it's not cluttered up with the kids' detritus).

We kept one of the dressers, painted the walls light blue, and I finally got to install a set of tiles that I was given for my 21st birthday and have been carrying round waiting for the 'forever' house.

I love the kitchen, but at the risk of making the Husband hold his head in his hands with despair, if money had been no object, here's what I would have loved to have done:
I would have extended over where is now the decking, filling in the space at the back of the house. It may not even be architecturally possible, given the pecularities of how the exisiting house is built, but I don't let things like that get in the way of a good kitchen fantasy. There would be sliding glass doors which would open up the entire extended back of the house to the garden in the event of sunshine. The roof might even be insulated glass using something sourced probably from Germany, or even Denmark involving a perilous cross-Europe delivery and much teeth sucking to install (yes, I love Grand Designs...)
I would keep long worktop where it now is, and reinstate an 'island' unit to delineate the end of the 'kitchen' area. There would be loads of storage and more glorious worktop. Beyond the island unit there would be an area for the table. Given the layout of other areas of the back of the house, the table would stretch across the back of the house, an old refectory style, possibly with benches to sit on. There would be a cosy seating area with a wood burner at the end.
Back to the kitchen though. So yes, there's worktop. Acres of it. I love the wooden worktops we have now (the Husband hates them) but some cool granite would be high on my list if we changed things - easy to keep clean and perfect for pastry, although after my River Cottage bread course, I'd need some wood somewhere for bread kneading - it's better on wood, apparently! I'd also make sure I got back the 'triangle' between sink, fridge and cooking area. We have it now, the holy triangle, except the table sits in the middle of it so when the Husband and I are both in there, we end up chasing each other round it trying not to get in each other's way.
Would I swap my range cooker? I still struggle with this. I don't know. We currently have 5 gas rings and 2 electric ovens, and they are great - even if the non-fan oven is now called 'the Christmas oven'. I wonder about induction hobs - I haven't come across them much, but they are very impressive. And what hardship to have to choose a whole new set of pans too? I quite fancy the idea of a hob in the island unit - but induction or not, it would need to have at least 5 rings. One thing we would defintiely include would be a cooker hood. At the moment, in time of toast burning, and over-zealous grilling/griddling, we run around closing the kitchen door to prevent smoke getting to the smoke alarm in the hall, and open the roof light, then sit surrounded by acrid fumes waiting for the breeze to do its job. Given the nature of old houses, when I'm boiling something for a long time in the winter, we get a huge amount of condensation. A cooker hood to extract steam and fumes would be wonderful.
Beyond that, well, I haven't thought much - this is a fantasy you know. I'd keep a 'rustic' look - despite my desire for state of the art glass doors, I couldn't go completely modern with the look of the room, and the dresser would definitely have a home somewhere. It would be cool in the summer, warm and cosy in the winter, and I'd definitely keep my hanging pan rack - although with all the storage around instead of having the pans hanging from it, perhaps it could hang some hops, and some more strings of chillies instead. That and a trophy copper milk pan. Most definitely!!
And you - if money was no object, and wishes came free, what would you have in your dream kitchen?
_________________________________________________________________
This is a sponsored post for electrolux
reade more...
So the kitchen has not been the kitchen of the house for that long, relatively speaking, and certainly before we moved in, the house hadn't had small children living in it for some time. With 2 big dressers at either end, an enormous and impressive French range cooker (can one admit to wanting to buy a house solely for the cooker that is currently in it?) and a big 'breakfast bar' which provided worktop and pan storage down the centre of it, dividing the space between the cooker and the sink, it was not a family friendly kitchen. The room is not all that big, and all this big furniture reduced the space quite dramatically. Chuck in 2 small windows, some dingy yellow paint and navy blue tiling, and you can imagine it was quite dark and dingy. We immediately got rid of the breakfast bar (Ebay is a marvellous thing), and installed the 'family' table. The beautiful range cooker eventually had to go too - beautiful and French it may have been but trying to get parts for it as it started to breakdown was a nightmare. We put in a roof light to increase the natural light and a few years ago we put proper units in and moved where the cooker was (installing a newer and less complicated range cooker which I do love for all that it's not French and steel) to give a long run of worktop, perfect for me to make as much mess as I want (when it's not cluttered up with the kids' detritus).
We kept one of the dressers, painted the walls light blue, and I finally got to install a set of tiles that I was given for my 21st birthday and have been carrying round waiting for the 'forever' house.
I love the kitchen, but at the risk of making the Husband hold his head in his hands with despair, if money had been no object, here's what I would have loved to have done:
I would have extended over where is now the decking, filling in the space at the back of the house. It may not even be architecturally possible, given the pecularities of how the exisiting house is built, but I don't let things like that get in the way of a good kitchen fantasy. There would be sliding glass doors which would open up the entire extended back of the house to the garden in the event of sunshine. The roof might even be insulated glass using something sourced probably from Germany, or even Denmark involving a perilous cross-Europe delivery and much teeth sucking to install (yes, I love Grand Designs...)
I would keep long worktop where it now is, and reinstate an 'island' unit to delineate the end of the 'kitchen' area. There would be loads of storage and more glorious worktop. Beyond the island unit there would be an area for the table. Given the layout of other areas of the back of the house, the table would stretch across the back of the house, an old refectory style, possibly with benches to sit on. There would be a cosy seating area with a wood burner at the end.
Back to the kitchen though. So yes, there's worktop. Acres of it. I love the wooden worktops we have now (the Husband hates them) but some cool granite would be high on my list if we changed things - easy to keep clean and perfect for pastry, although after my River Cottage bread course, I'd need some wood somewhere for bread kneading - it's better on wood, apparently! I'd also make sure I got back the 'triangle' between sink, fridge and cooking area. We have it now, the holy triangle, except the table sits in the middle of it so when the Husband and I are both in there, we end up chasing each other round it trying not to get in each other's way.
Would I swap my range cooker? I still struggle with this. I don't know. We currently have 5 gas rings and 2 electric ovens, and they are great - even if the non-fan oven is now called 'the Christmas oven'. I wonder about induction hobs - I haven't come across them much, but they are very impressive. And what hardship to have to choose a whole new set of pans too? I quite fancy the idea of a hob in the island unit - but induction or not, it would need to have at least 5 rings. One thing we would defintiely include would be a cooker hood. At the moment, in time of toast burning, and over-zealous grilling/griddling, we run around closing the kitchen door to prevent smoke getting to the smoke alarm in the hall, and open the roof light, then sit surrounded by acrid fumes waiting for the breeze to do its job. Given the nature of old houses, when I'm boiling something for a long time in the winter, we get a huge amount of condensation. A cooker hood to extract steam and fumes would be wonderful.
Beyond that, well, I haven't thought much - this is a fantasy you know. I'd keep a 'rustic' look - despite my desire for state of the art glass doors, I couldn't go completely modern with the look of the room, and the dresser would definitely have a home somewhere. It would be cool in the summer, warm and cosy in the winter, and I'd definitely keep my hanging pan rack - although with all the storage around instead of having the pans hanging from it, perhaps it could hang some hops, and some more strings of chillies instead. That and a trophy copper milk pan. Most definitely!!
And you - if money was no object, and wishes came free, what would you have in your dream kitchen?
_________________________________________________________________
This is a sponsored post for electrolux


